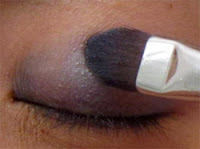
No glamorous holiday look is complete without some very smoky, shiny or glittery eye makeup! This tutorial is going to be on what I call the Midnight Express - a tutorial on how to achieve a smoky blue/purple eyeshadow look.
Here are the eyeshadows I used to create this look. You do not need these exact colors colors and they are listed here for your reference. Don't be afraid to at least try to use what you own before going out to get a bunch of new stuff!
-Coastal Scents 88 Original Eyeshadow Palette
-Coastal Scents Metal Mania Eyeshadow Palette
-MAC A41 Beauty Marked Eyeshadow
- Lise Watier Couleur Folie Mineral Loose Powder Eyeshadow in Blanche
Refer to this diagram if you're not sure what part of the lid I'm talking about.
I begin with applying Two Faced Shadow Insurance Eye Primer followed by Shu Umemura Glow On Peach Blush as a base all over eyelids.
I have a specific shadow brush that I use to apply base shadows just so I don't have to worry about getting undesirable colored mixed in with my base.
Then with any preferred eyeshadow brush, apply satin sky blue from 88 Original Palette from upper lashline to mid-lid.
Fill in the color on your lid and shape the shadow neatly as you get to the outer corner of your eyes. I specifically created a slanted line because I wanted to do something retro, a touch of rock n' roll and definitely lots of glam to the look.
Next, I picked a metallic grey with hints of green from my Metal Mania Palette to be my transition and blending color. I applied this to the center of my lid from upper lashline to the middle. The exact space covered will vary and doesn't need to be exact because you can always add or take away (using a Q-Tip) color if you need. Just don't apply it all over your lid because you want the gradient effect.
Then, I used a dark, indigo-like purple to create and fill my outer v. I used a small, soft dome-shaped brush. I like using a soft brush because I'm heavy-handed with my eyeshadow and this brush helps soften up what is applied on. I can just continue to blend and add more shadow if I want to intensify the color. Alternatively, you can use a smudge brush or a pointed brush to get the job done. It's what you're most comfortable with using.
Use a fluffy crease brush to blend the dark purple shadow you've applied to your upper outer V. This is what your eyeshadow should resemble once you've blended out the color onto your crease.
I then went over the lower part of my outer v (from upper lash line to the corner of the eye) with MAC's A41 Beauty Marked. Beauty Marked from the photo look like a glittery plum color but it swatches like a matte black with sparkles. The reason I used this is to make my look smokier while adding a bit of a glitter effect.
I always line my entire upper lashline with a dark colored eyeshadow for more depth. This is step however is optional.
The look is now 80% complete. Again, I lined my entire upper lashline with Beauty Marked for added depth. Some of you may like the look more if you left the beginning half of your lashline unlined. Try it and see what you like.
I'm happy with how the eyeshadows look so I used Heroine Make's liquid eyeliner to wing out the eyes
for that retro-glam feel. I took some Lise Watier Couleur Folie Mineral Loose Powder Eyeshadow in Blanche and applied some to the inner corners of my eyes to open them up. Sorry for the oogly eyes. The heat was making them dry and red.
To finish the look, I dabbed some of that dark indigo purple from 88 Original onto my smudge brush and began on the corner of my upper lashline and in one continuous stroke, dragged the brush all the way down to my lower lashline and lined the eyeshadow to about halfway.
If you want to intensify the look, you have the option to line your water line all the way with some black kohl liner.
And last but not least, I used my favorite pair of lashes, Dolly Wink #10 Sweet Cat which you can get over at rakuten.com. Remember to go over any areas where the eyelash adhesive has dried but didn't quite disappear with a black eyeliner. Liquid or gel liners preferred.
And tada, we're done! This was taken after the party. The look remained intact throughout the night. I got some compliments and had a lot of fun.
I hope you found this tutorial useful. More to follow!


No comments:
Post a Comment